Making meringue nests is fun and easy if you follow a few simple guidelines. They need very few ingredients. They do take a little time but they are well worth the effort.
Meringue nests make great desserts and are even a popular dessert with fruit in some of the well-known diet groups.
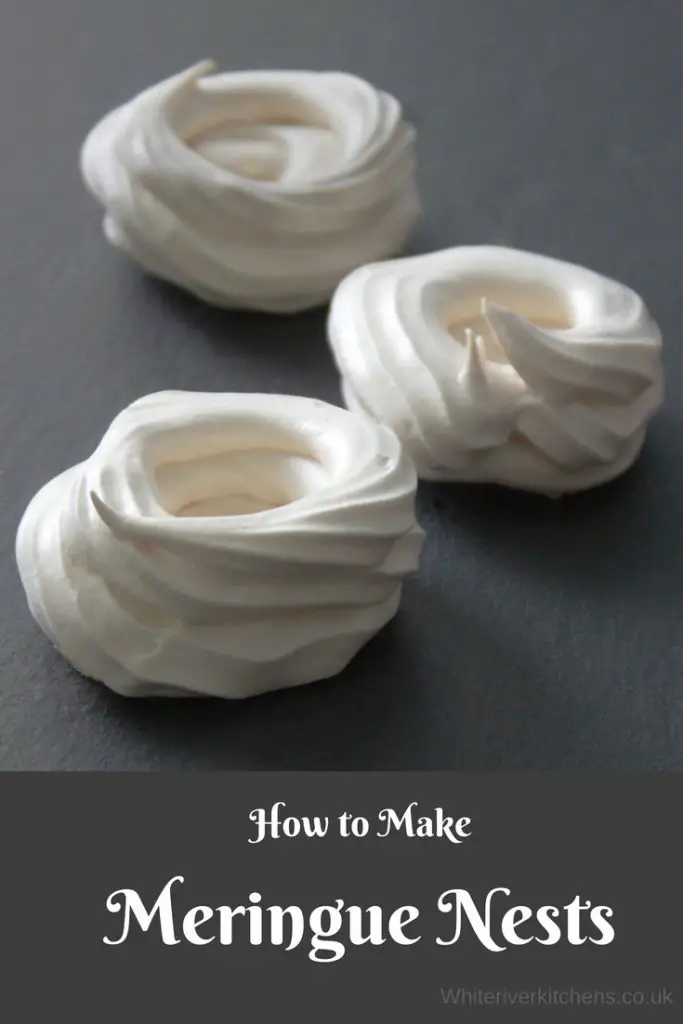
This easy-to-follow recipe will help you to make your base that can easily be used for many different delicious desserts and sweets. Recipes can be found on this blog.
If you want to know how to make your meringue nests more successful and avoid some of the pitfalls then check out our tips section. It shows how to improve your results.
I affiliate with some products here. This does not affect you. If you wish to find out more click here
How to Make Easy Meringue Nests


A great meringue cookbook on Amazon
If you enjoy making them then this book could come in handy.

How To Make Meringue Nests
Ingredients
- 2 egg whites
- 100 g caster sugar
Instructions
-
Preheat your oven to a very low temperature of about 60C/140F. You can use a higher temperature if you wish however a low temperature helpt to stop cracking
-
Separate your egg whites from the yolk. Make absolutely certain that there is no yolk at all in your mixture
-
Weigh out your sugar
-
Whisk up your egg whites on a low-speed setting until they are frothy
-
Now, still using a low-speed setting, very slowly add your sugar and whisk as you add each spoonful
-
Increase your speed to medium and keep whisking until your mixture reaches a firm peak (see the article below for details) Note You may need to reduce the speed back down again towards the end when the mixture is thicker.


Stand mixers make life much easier (available on Amazon)
I found myself wishing I was using a stand mixer like the one above. The hand mixer worked really well but it would be much easier with one of these.
To Test If Your Meringue Nests Are Ready
It’s difficult to know when your meringue nests are ready if you don’t know what to look for. There are two tests you can do to see if they are ready or not.
You will see when your nests’ mixture is starting to become meringue. They will start to firm up and go white. This can take a while. First, they, will form soft peaks and then much firmer ones. See below how to tell if they are ready:
Test 1
This is the easiest and safest test to use. You can tell if your mixture is ready for piping and cooking if the peaks are firm. When you hold your whisk upsidedown if they flop over you have a soft peak and if they stand proud you have a firm mixture and it is ready to cook.
Test 2
Probably not advisable but I read online somewhere that there is a bowl over the head test. If your mixture is ready you can lift your bowl over your head and put it upside down and the mixture will stay in. I’m not sure I’d advise doing this because if you get it wrong you end up with a sticky white mess over your head. Of course, it is almost irresistible to try it. I did for these and the mixture stayed in the bowl. Phew!
8 Top Tips For Top Meringues
- Fresh eggs. If your eggs are not fresh the mixture will not form as well, the older the eggs the less chance of getting great results.
- Make certain you have NO FAT absolutely none. Fat will stop your meringues from working. to avoid fat make sure you remove ALL the yolk from your eggs. Also, make sure you have no fat residue on your bowl. Plastic can retain small amounts so use either a glass bowl or a metal one to mix your meringue in.
- If you have too much moisture in the air it can lead to chewy meringues centres. If you like chewy that is fine but if you want firmness all the way through make sure you create your nests on a dry day. Here in sunny Cornwall, it is virtually always most due to being near the sea so soft centres can be an issue. If you do get them simply turn them upside down and cook them from the bottom. This removed more moisture.
- Moisture kills meringue stiffness. If you have too much moisture in the air it can stop your meringues from forming a stiff peak.
- Work in the cool. I was working in the summer heat with record temperatures. I wanted to start early but didn’t want to disturb the neighbours so I started at 8 am. Even then it was too hot. My mum had recommended the use of a cold cloth around the bowl. Of course, if you are using a stand mixer you might not be able to do that. But even with a perfectly stiff mixture, the heat got to the mix and it started to lose its shape very quickly. Keeping the mixture cool helps it to firm up more and stay that way.
- Add your sugar slowly. Adding it too fast will stop it from bonding together and the mixture won’t hold its shape.
- Keep your whisk speed low to prevent air bubbles then increase it only to medium.
- Cook at a really low temperature to help to stop your nests from cracking.